TGE Presets : How to Install and Use
Hi, I'm Cortney.
Lifestyle blogger, photographer, mother to my son Boden and frenchie Smalls, wife to my hubs Trevor. I built this space in an attempt to inspire you to find your edit and empower you to create the life you desire. Through digital content and honest storytelling, I hope to guide you along the way. Because everyone has an edit, and I'm here to help you find yours.
Get To Know Me
Categories
01. Style
02. Life
03. Wellness
Up Next:
So you’ve decided to purchase from my TGE Preset Collection — thank you so much! By now you should have received these files via email… and you may already be overwhelmed by the complexity of it (ie. file names .xmp and .dng.) But don’t worry, it’s a lot less difficult than it seems — if you have instructions! So, here’s the blog post that will walk you through how to install and use my presets.
And if you haven’t yet read the post “How to Make the Most of Your Photoshoot with Me (The After-Plan)” — I suggest you do this beforehand.
Using presets is a great way to ensure your brand has a consistent aesthetic — not to mention maintain the look and feel from the photos we captured via a photoshoot. When you work with me, you’ll have the option to purchase the presets I used for your shoot (I usually customize for each client). Or I’ll direct you to purchase the standard preset from my shop (TGE Preset Collection 02 coming soon).
There are two Lightroom Desktop versions — Lightroom Classic (for desktop-only) and Lightroom CC (cloud-based application that works across desktop, mobile and web). Both are amazing photo editing platforms that offer a variety of options and differ in price. I have both but personally use Desktop more as I prefer the editing features, but the install process is the same across both.
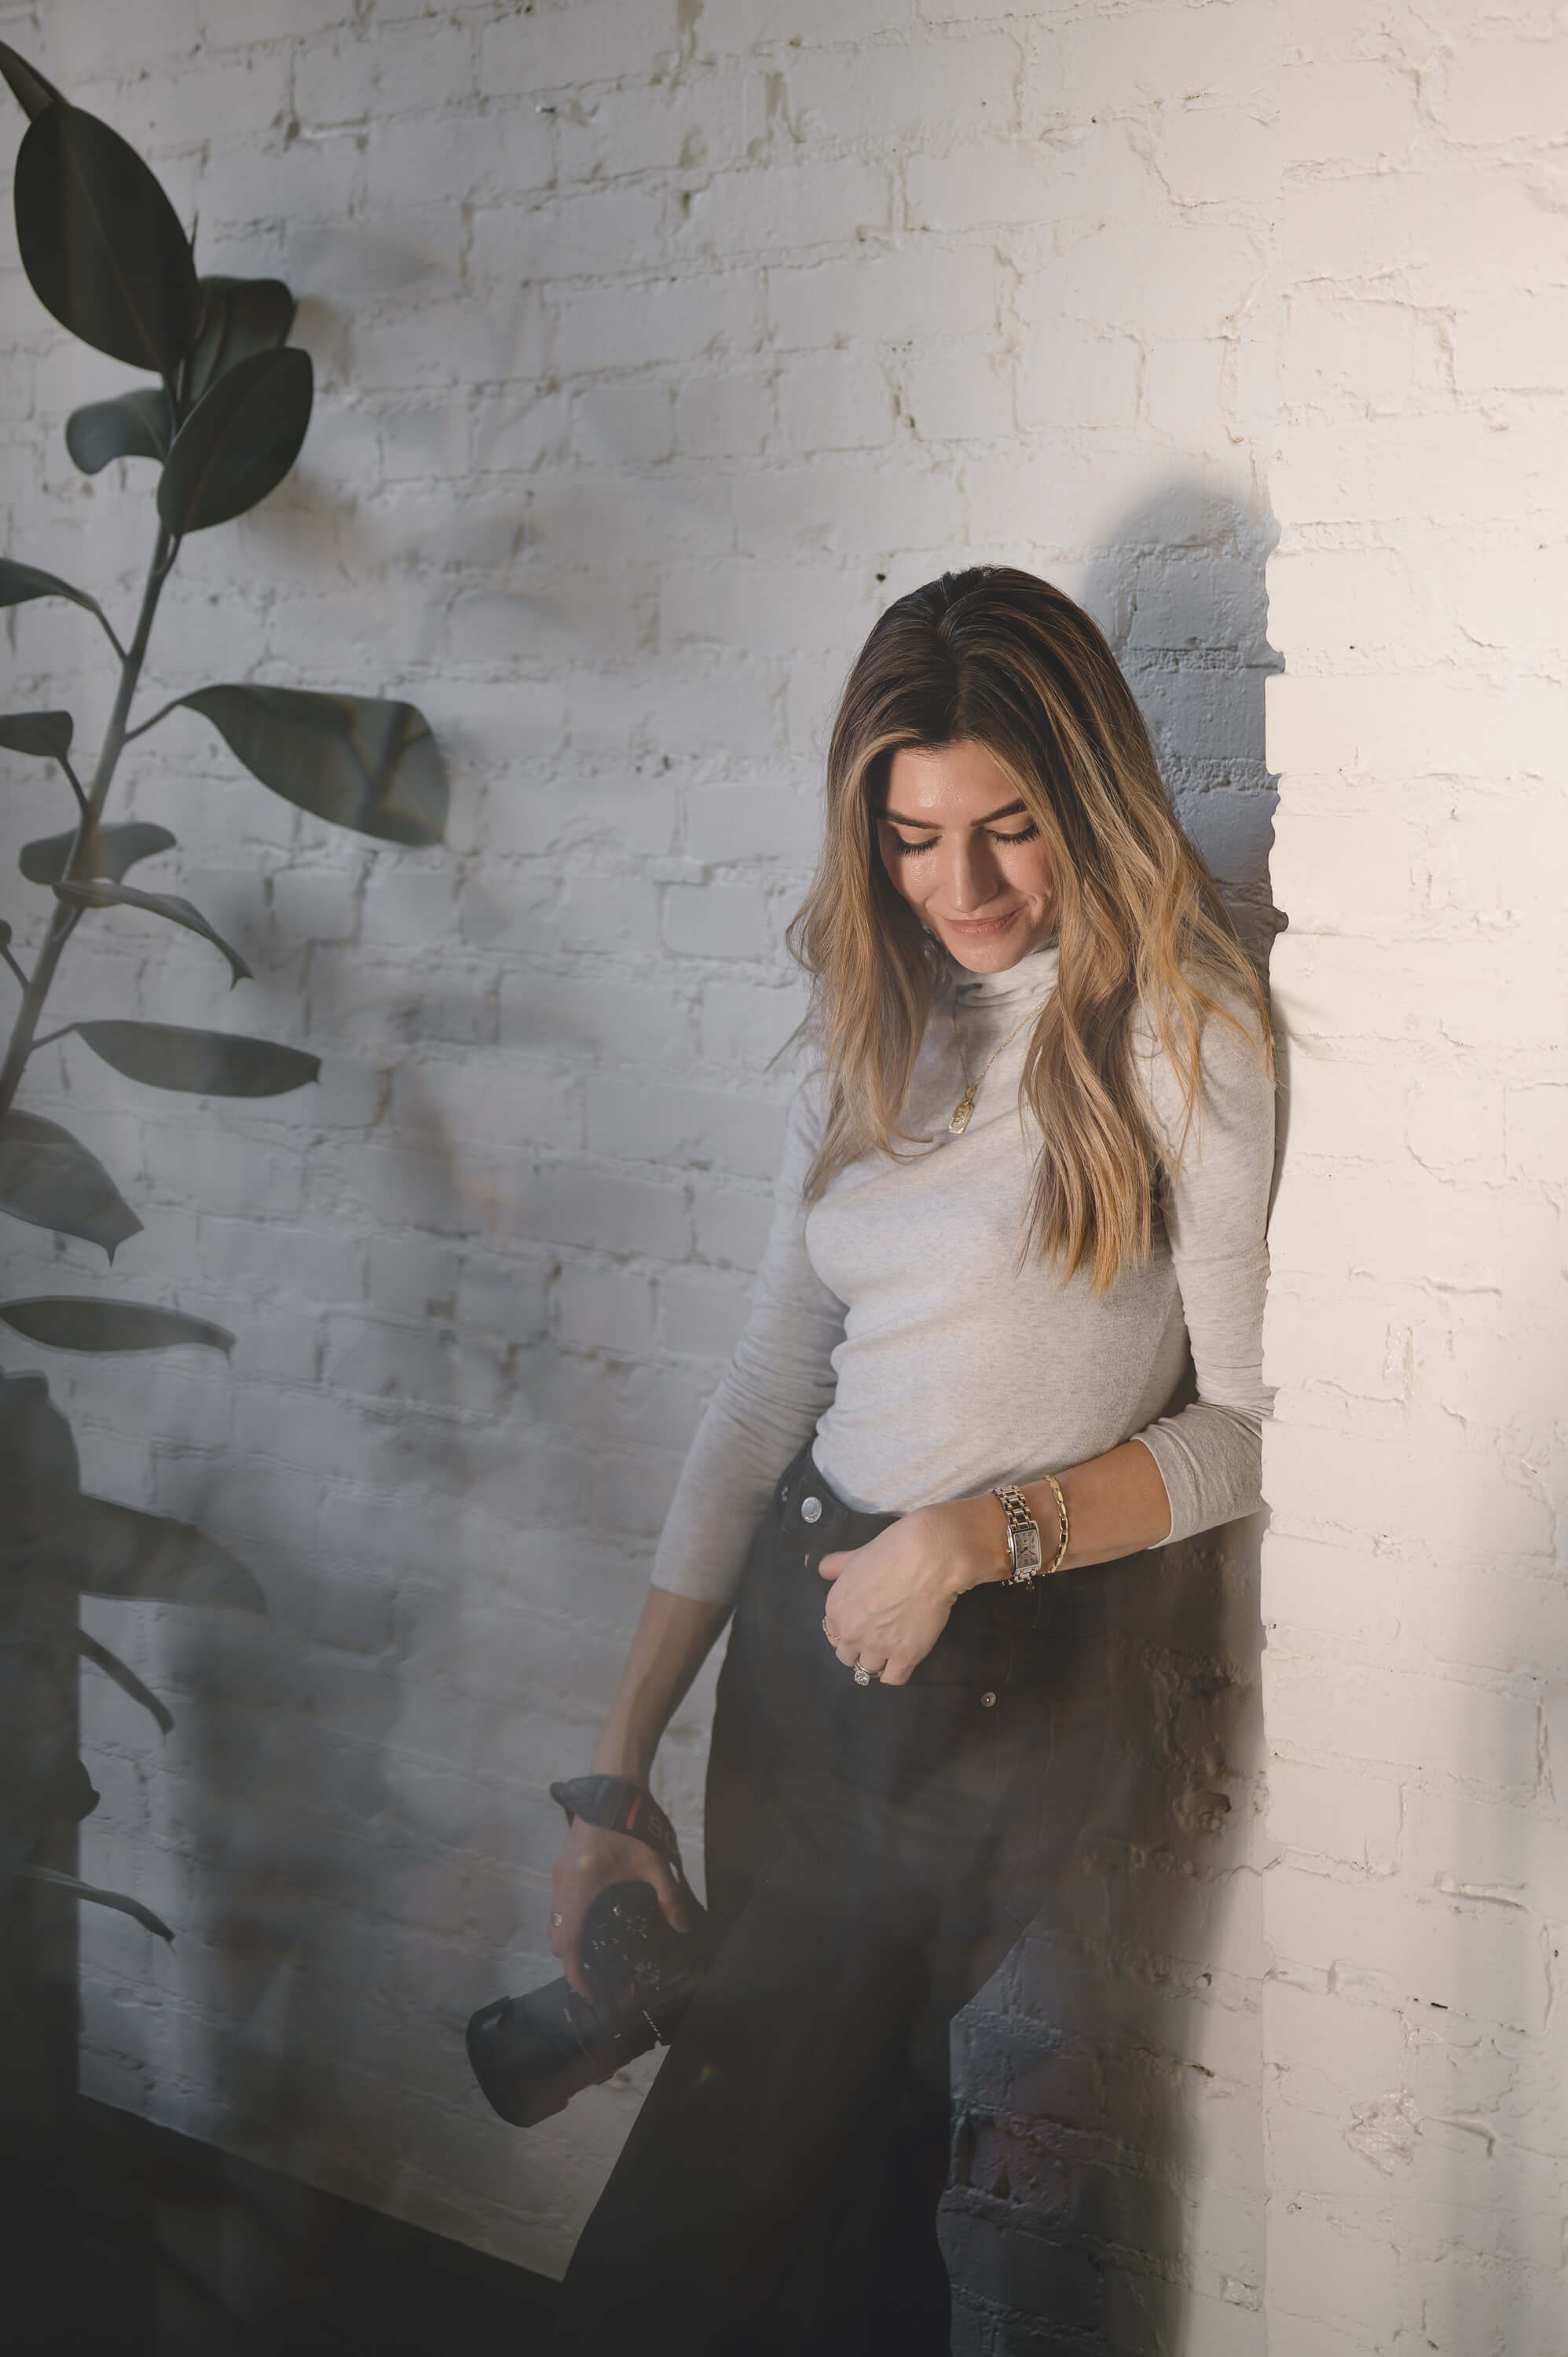
How to Install & Use Lightroom Presets for Desktop
STEP 01 :: LOCATE
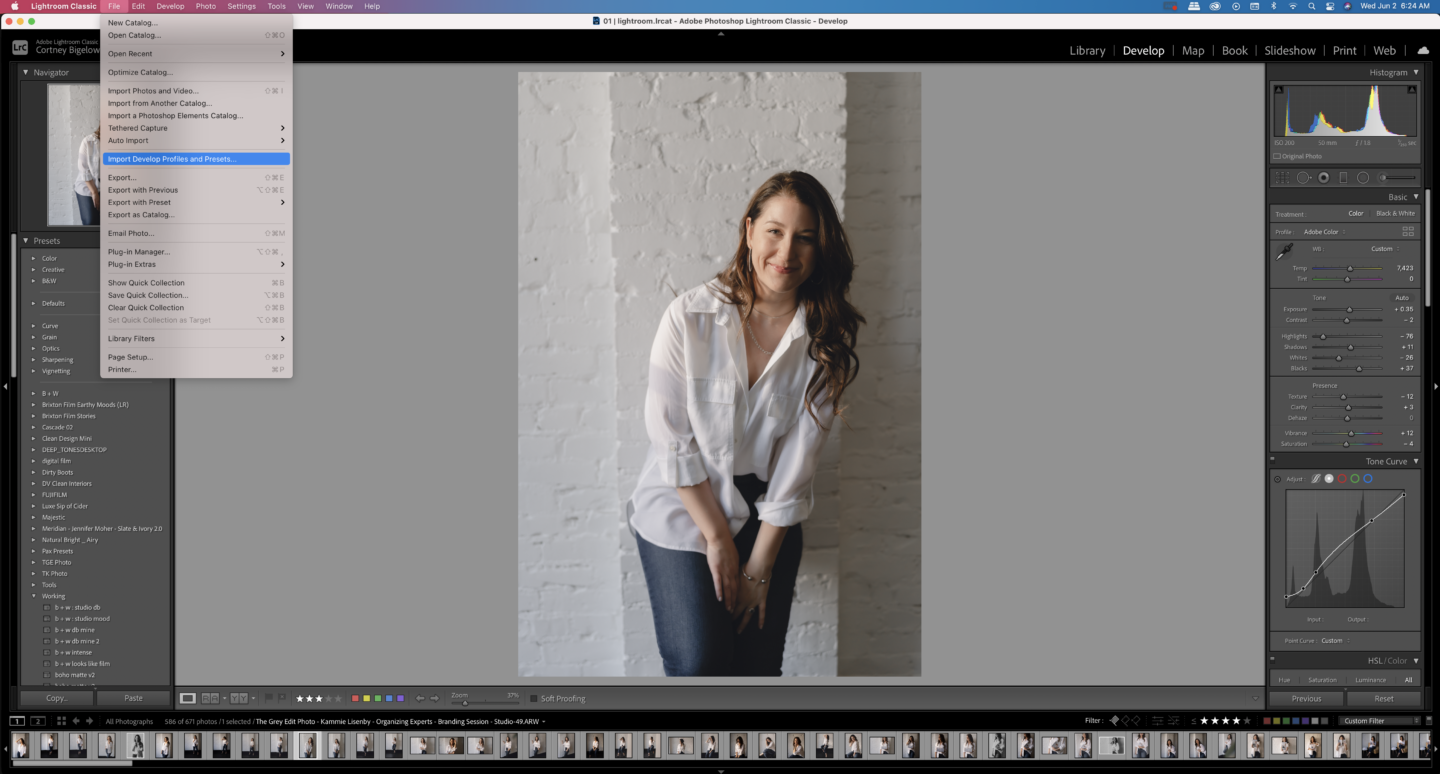
Open up the Develop Module in Lightroom (next to Library) and from your menu bar, choose File > Import Develop Profiles & Presets
STEP 02 :: IMPORT
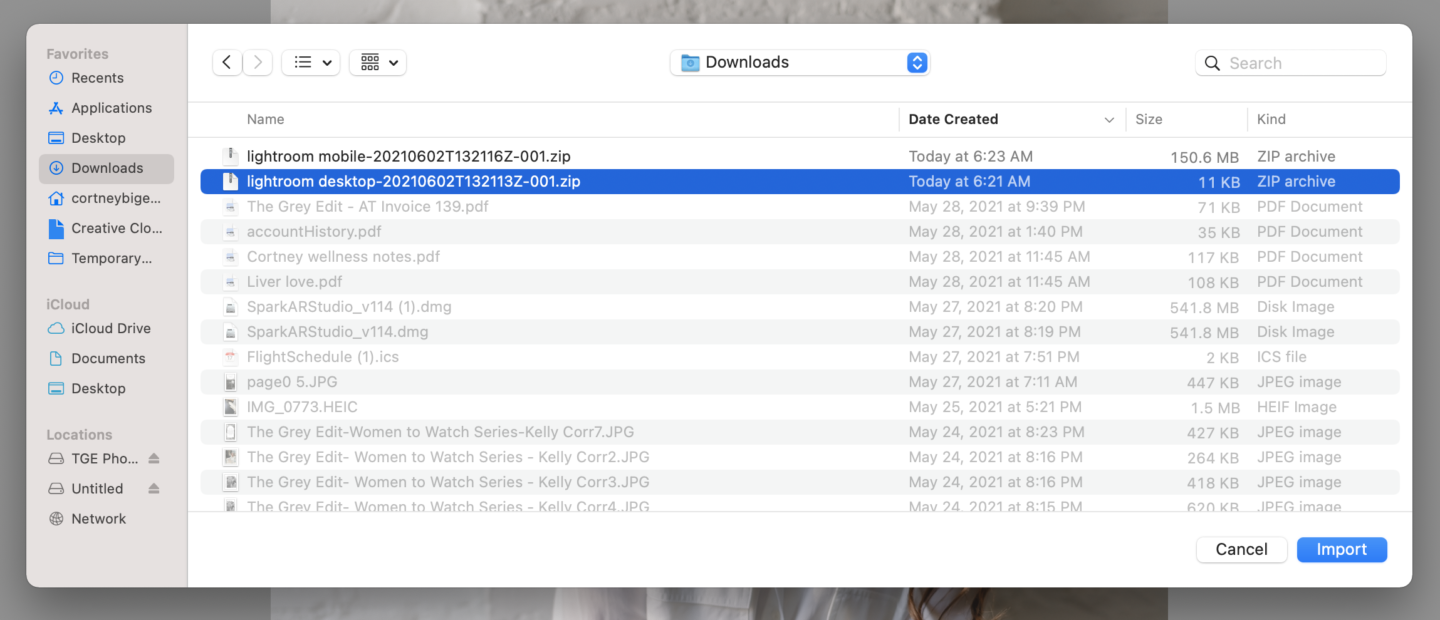
Navigate to the preset or preset folder you wish to import (they should be in a desktop folder with the file type .xmp)
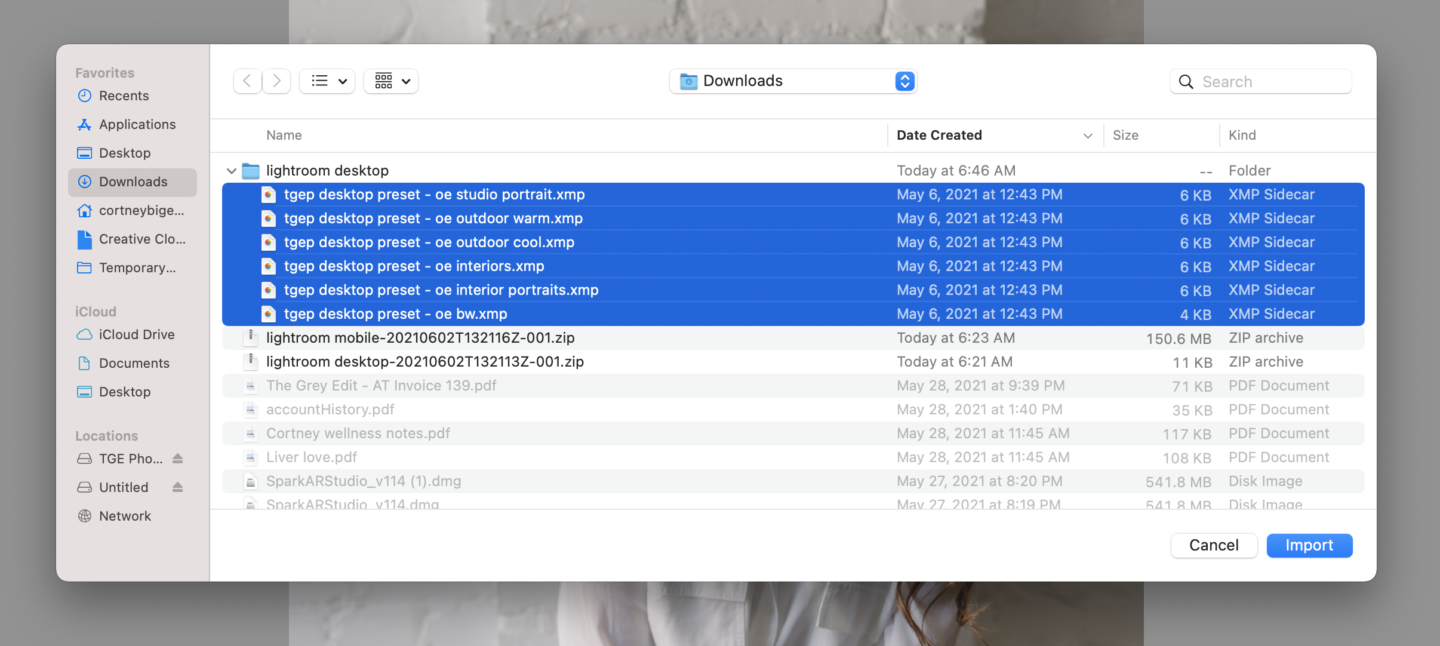
STEP O3 :: IMPORT COMPLETE
These presets will now be located in your Presets Panel on the left-hand side of your application. You can click the triangle to open a folder if you imported more than one.
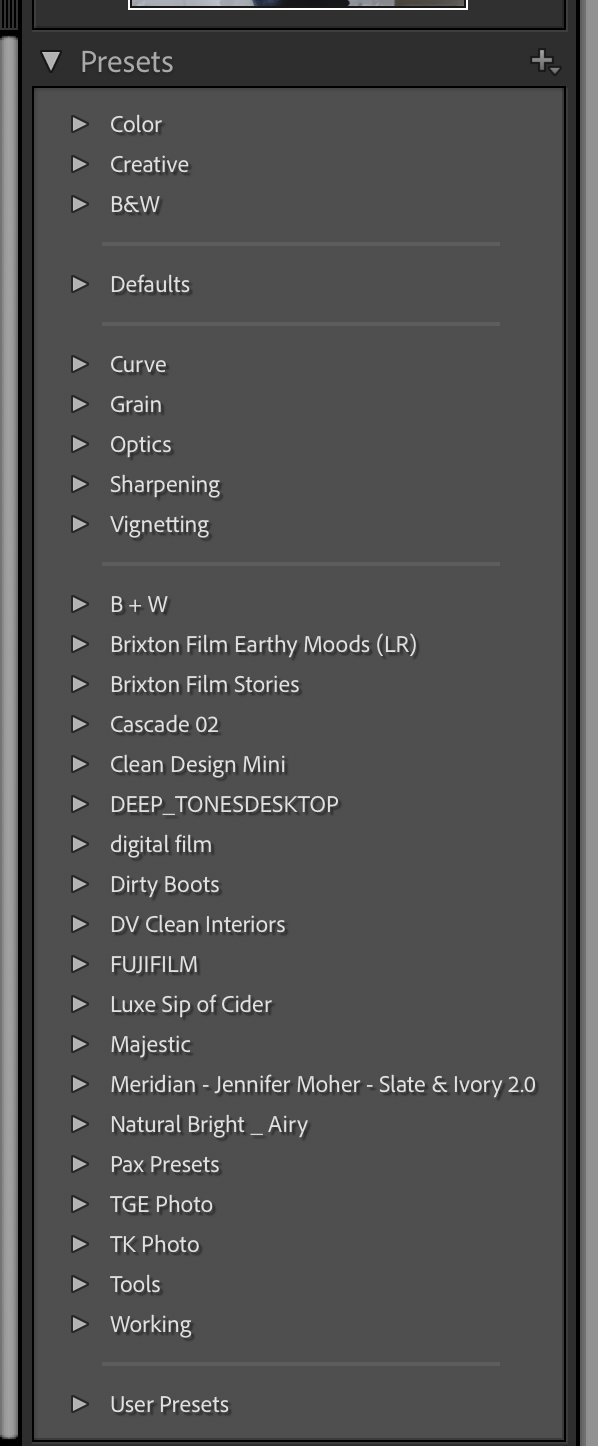
STEP 04 :: APPLY
To decide which preset to use and apply, I like to simply hover over the options and watch my image change. When I see one I like, I click to apply it.
STEP 05 :: TWEAK
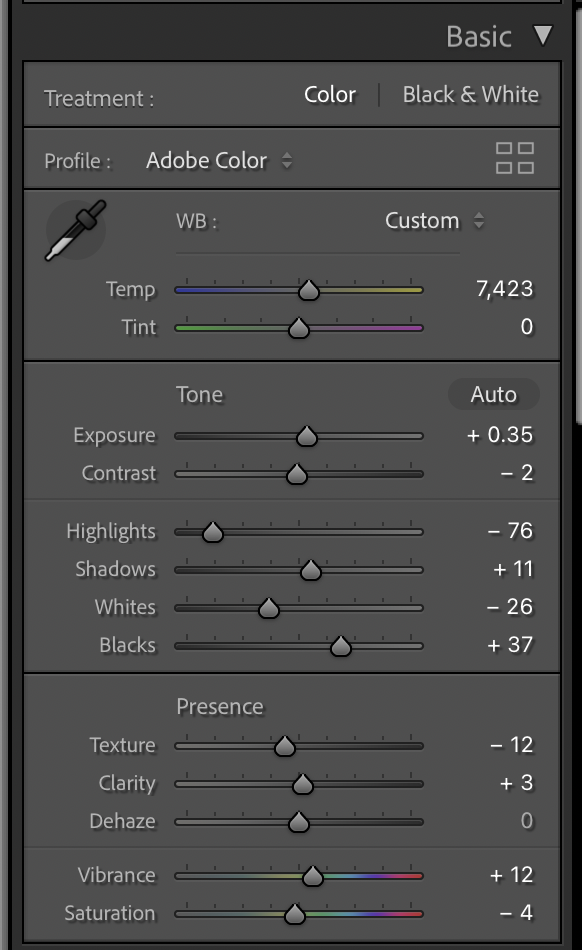
No preset will ever be a one-size-fits-all, as every shot has so many different factors that make it up (tyoe of camera, type of lens, lighting, coloring, subjects). With this, you may need to slightly tweak some things to make sure the preset works for your photo(s). The things I usually suggest touching are located in the Basic Panel and I suggest going down in order —
- Temperature: is the photo too warm? drag the slider slightly into the blue. is the photo too cool? drag the slider slightly into the yellow.
- Exposure: is the photo over too bright? drag the slider slightly towards the left. is the photo too dark? drag the photo slightly towards the right.
STEP O6 :: APPLY TO MULTIPLE
The cool thing about presets is that once you have it applied to a photo and you’re digging the look, you can copy and paste to multiple images. I like to do this in chunks, depending on my photo setting. For instance, if I have images of a client in one location in my studio, I’ll copy (COMMAND + SHIFT + C on mac) the image and then highlight the rest from that area and paste (COMMAND + SHIFT + V on mac). I will usually tweak the first photo in each location set this way, then paste to the remaining. You will likely have to tweak if you use the same preset for inside and outside, but this is why you may have purchased multiple versions of the same presets with names specifying where to use the presets.

How to Install & Use Lightroom Presets for Mobile
STEP 01 :: LOCATE
Unzip the mobile preset(s) (the file names will end in .dng) on your computer
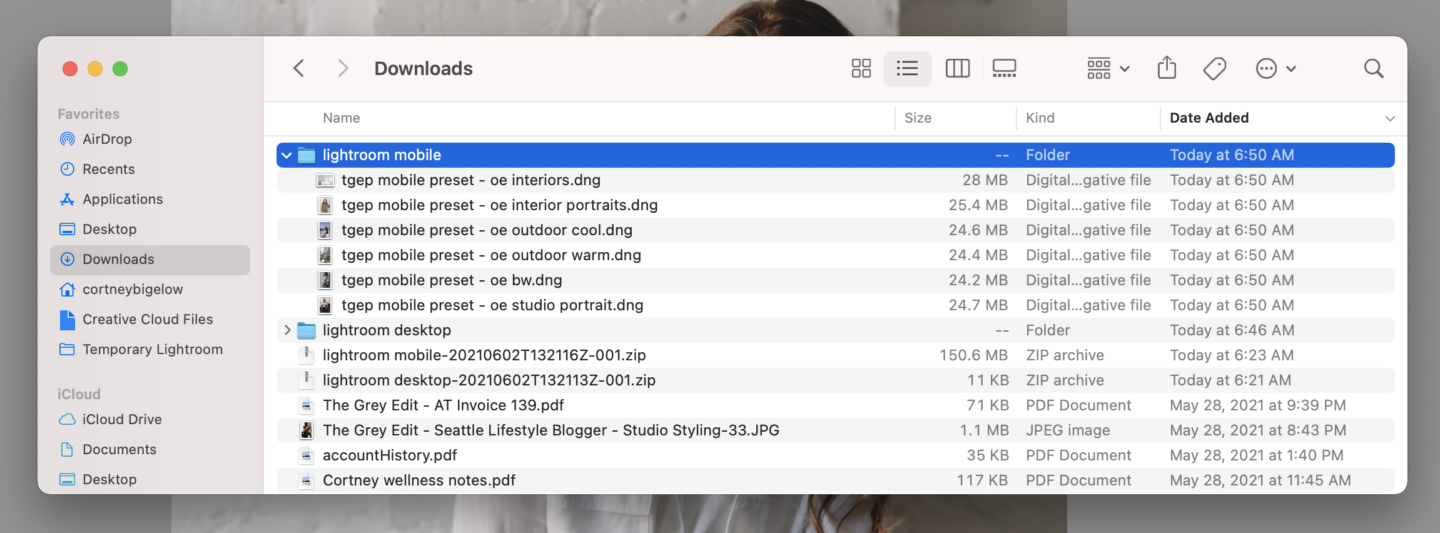
STEP 02 :: TRANSFER
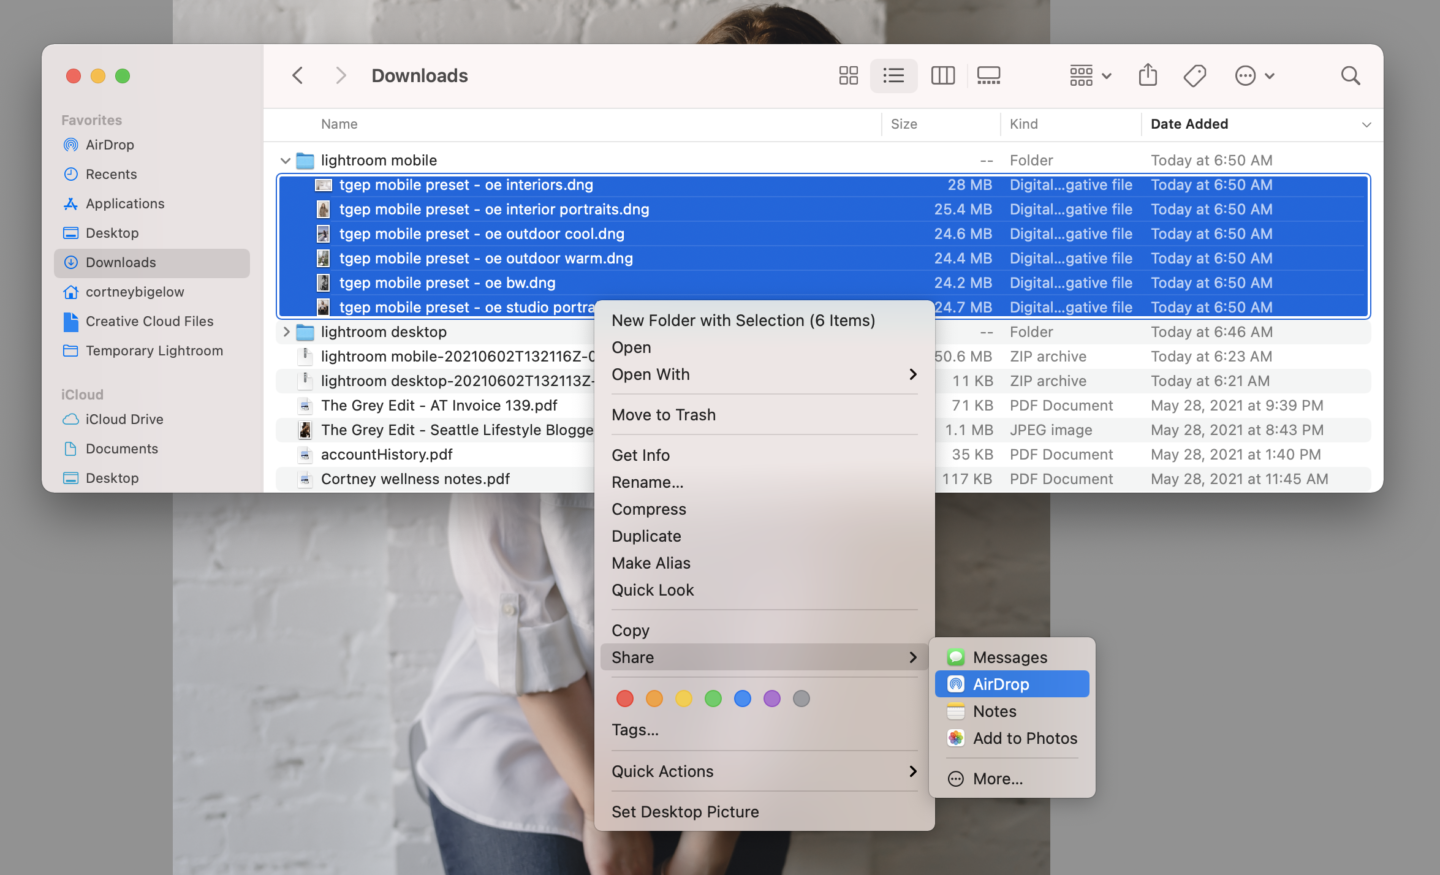
Save the preset(s) to a cloud storage option, so you can access them on your mobile phone. Note, these will look like images, but will contain preset information, so don’t be fooled. I like to airdrop these .dng files to my iPhone via my Mac computer or MacBook laptop so that I have them sitting in my Camera Roll. If you want to get real organized, you can create an album on your phone titled “Presets“.

STEP 02 :: LIGHTROOM APP
Open your free Lightroom app (or download it here if you don’t have already)

STEP 03 :: IMPORT
Click the blue image icon in the bottom right corner. Go to the (…) Settings option in the top right corner of the app and choose “Select Mode”. Select the preset photos you’d like to import. Click “Add“. You’ll receive an import successful message.
STEP 04 :: CREATE & NAME
Navigate to one of the newly imported .dng/photos, then click on the three dots inside a circle in the upper right-hand corner of the screen where you can choose “Create Preset“. Give your preset a name (to stay organized you can keep it the original name of “TGE Photo: preset name”). You’ll receive a success message. Repeat these steps for each .dng/preset file.
STEP 05 :: APPLY
Import or select an image of your own in the Lightroom Mobile App to use your new preset(s) on. Swipe left on the bottom options until you see “Presets” and choose the new preset or collection you just imported. To decide which preset to use, you can simply click through each. When you find one you like, simply check the mark in the lower right corner.

STEP 06 :: TWEAK
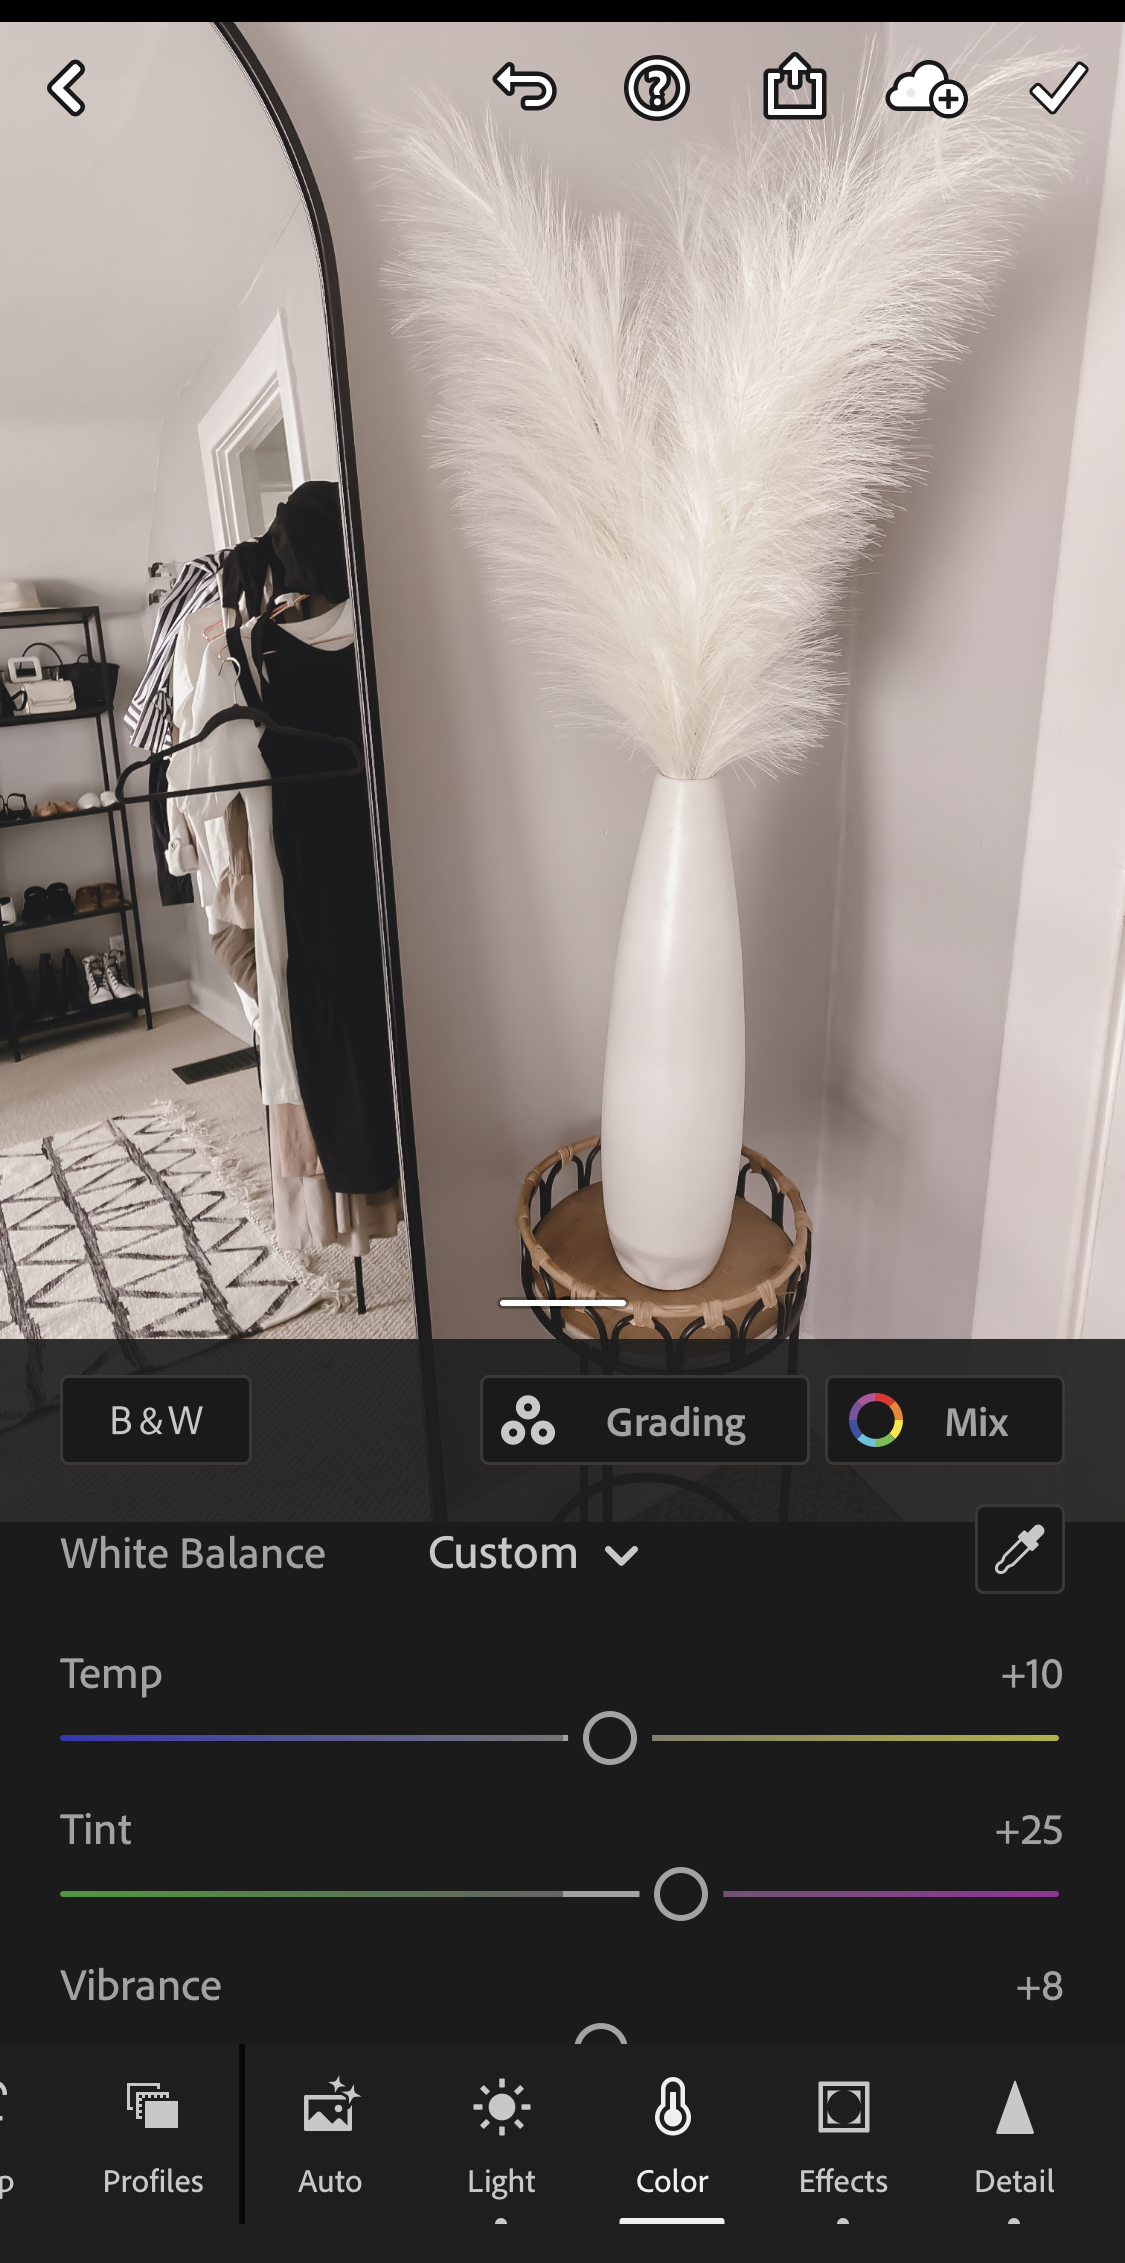
Same note as before (scroll up to desktop step 05) — no preset is a one-size fits all and thus you might have to change your temperature (“Color” tab) and exposure (“Light” tab) with each image.
STEP 07 :: APPLY TO MULTIPLE
Also same note as before (scroll up to desktop step 06) — once you’re digging the look of the preset on your photo, you can copy and paste to multiple images. I like to do this in chunks, depending on whether the image is shot in a similar light and location.
SHARE THIS POST:
Leave a Reply Cancel reply
This site uses Akismet to reduce spam. Learn how your comment data is processed.
Meet The Blogger
Lifestyle blogger, photographer, mother to my son Boden and frenchie Smalls, wife to my hubs Trevor.
I built this space in an attempt to inspire you to find your edit and empower you to create the life you desire. Through digital content and honest storytelling, I hope to guide you along the way. Because everyone has an edit, and I'm here to help you find yours.
Hi, I'm Cortney.
Get To Know Me
Mother. Wife. Blogger. Photographer. I built this space in an attempt to inspire you to find your edit and empower you to create the life you desire. Through digital content and honest storytelling, I hope to guide you along the way. Because everyone has an edit, and I'm here to help you find yours.
Hi, I'm Cortney
Learn More
Home
Style Formula
Shop
Contact
The Blog
Style
Life
Wellness
FAQ
COPYRIGHT @ 2022 THE GREY EDIT / WEB DESIGN BY CHLOE LEONARD STUDIO / PRIVACY
About
Subscribe
Sign up to become an insider of The Grey Edit and never miss a beat.


